Starting milkweed seeds indoors is a great way to ensure you will have milkweed plants ready for them when they arrive.
Cold stratification is just a fancy way of saying cold exposure and is known to increase germination rates by waking the seeds up from their dormancy cycle.
Most Milkweed varieties need 30 days of cold exposure to break their dormancy cycle and this can easily be done in your own home. In nature, this keeps Milkweed plants from germinating at times when conditions are not favorable for growth.

Materials Needed
- 1 Quart Ziploc Bag
- Milkweed Seeds
- Paper Towels
- Sharpie Pen
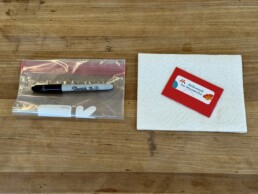
Step 1: Wet a paper towel and lay on a flat surface.
Wet a paper towel and gently wring it out so it is damp but not dripping with water. Too much water may cause the seeds to mold inside the bag.
Step 2: Sprinkle 10-20 milkweed seeds on the paper towel.
I may be best to sprinkle the seeds onto half of the paper towel so when you fold it, the seeds will not overlap.
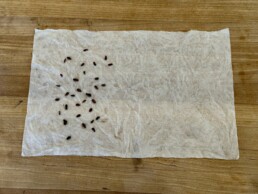
Step 3: Fold the paper towel into quarters.
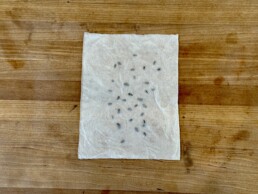
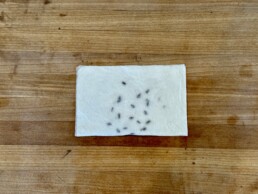
Step 4: Place the paper towel into the bag, seal, and label.
Label the bag with the date and type of seed. I like to include both the common and scientific name but this is up to you. You may even want to set a reminder on your phone or calendar so you can remember to take them out in 30 days.
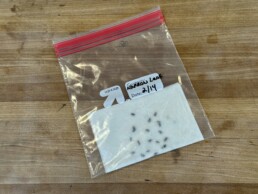
Step 5: Place in the refrigerator for 30-60 days.
Store the mixture in the refrigerator (33–38°F) for the recommended time on your seed packet. For Butterfly Milkweed (Asclepias tuberosa) Prairie Moon Nursery recommends 30 days of cold stratification.
Make sure to put your seeds somewhere safe in the fridge where they will not be disturbed. I like to put the bag into a tupperware container to ensure they don’t get smashed or damaged. Check on the seeds after a few weeks and if you notice the seeds starting to sprout in the bag, plant immediately!
Recommended Cold Stratification Periods According to Milkweed Species
Common Milkweed (Asclepias syriaca) 30 days
Swamp Milkweed (Asclepias incarnata) 30 days
Whorled Milkweed (Asclepias verticillata) 30 days
Prairie Milkweed (Asclepias sullivantii) 30 days
Western Sand Milkweed (Asclepias arenaria) 60 days
Butterfly Milkweed (Asclepias tuberosa) 30 days
Showy Milkweed (Asclepias speciosa) 30 days
*Note that warm weather species such as Tropical Milkweed do not need a cold stratification period.
How to Plant Milkweed Seeds Indoors
Step 1: Place seeds in trays
After 30-60 days, it’s time to plant your Milkweed seeds. You can plant them in seed trays, peat pots, small pots or any other container that allows for water drainage. Dampen your soil with a spray bottle full of water and place 1-2 seeds into each 2″ container. Sow seeds lightly on the top of the soil. You may press in gently but they need light to germinate so please don’t bury them!
Step 2: Water seeds gently
Be gentle when watering new seedlings because they are very delicate. It is recommended to water from the bottom up by adding a half-inch of water to the bottom of a tray and placing the pots inside this tray. Some people prefer to use a spray mister to water their seedlings.
You can check the soil moisture simply by touching it to see if it feels damp. Take care not to overwater your seeds which can lead to fungus growth. It is helpful to have a fan nearby to provide airflow and ventilation.
Step 3: Your seeds need light!
Make sure your milkweed has enough light to grow whether that be under an artificial grow light or near a sunny window. If your seedlings start to become “leggy” expose them to more light. The sturdier the seedling, the better!
Step 4: Plant outdoors
Milkweed seeds can be sown outdoors after the danger of frost has passed and the seedlings have grown around 1-5 inches high. To make the transition from indoors to outdoors less stressful, start by putting the seedlings outdoors for a few hours a day for up to a week before planting them outdoors.
Resources
https://www.americanmeadows.com/blog/2015/06/11/how-to-germinate-and-grow-milkweed-seed/Prairie Moon Nursery: How to Germinate Native Seeds.
Henrikson, Bob. Gardening with Prairie Plants. Nebraska Statewide Arboretum.
https://plantnebraska.org/plants/bloom-box/resources-for-bloom-box-gardeners.html

